Imagex Image and Fotos Upload & Management for Your Website
Epitome Manager is a new way for y'all to search, visualize, scan, and organize whatever images in your deject storage saucepan. Your Image Manager can be configured to observe all of the images stored in your bucket, or just the images that your users are accessing via imgix. Unlike cloud storage providers, imgix offers a visual interface with thumbnails of all of your images so you lot can chop-chop see the contents.
Accessing Image Manager
Navigate to Image Managing director by clicking the "Images" link in the tiptop navigation bar of the Dashboard. If you don't have an "Images" link or if y'all get an error bulletin, you may not have Image Manager enabled for your account. Contact united states if you would like enable this feature for your account.
Note: Image Managing director is available only for accounts with certain pricing plans. Contact Back up or your Account Manager to find out more than.
Browse
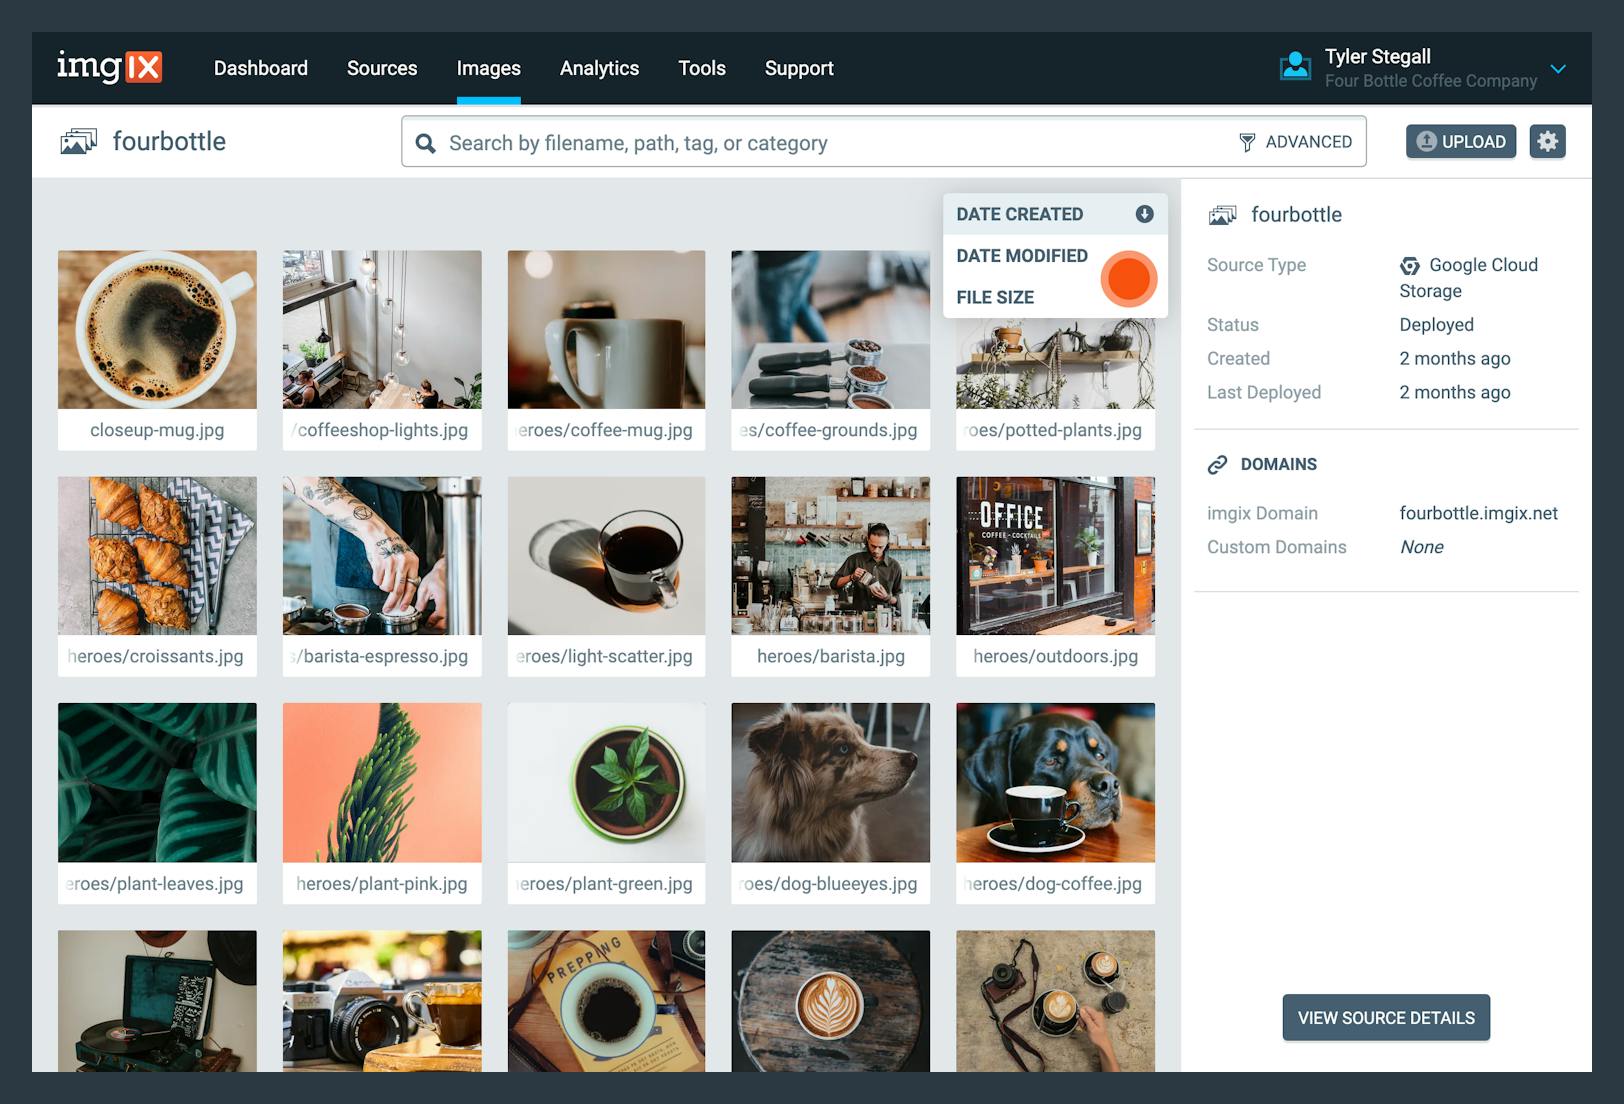
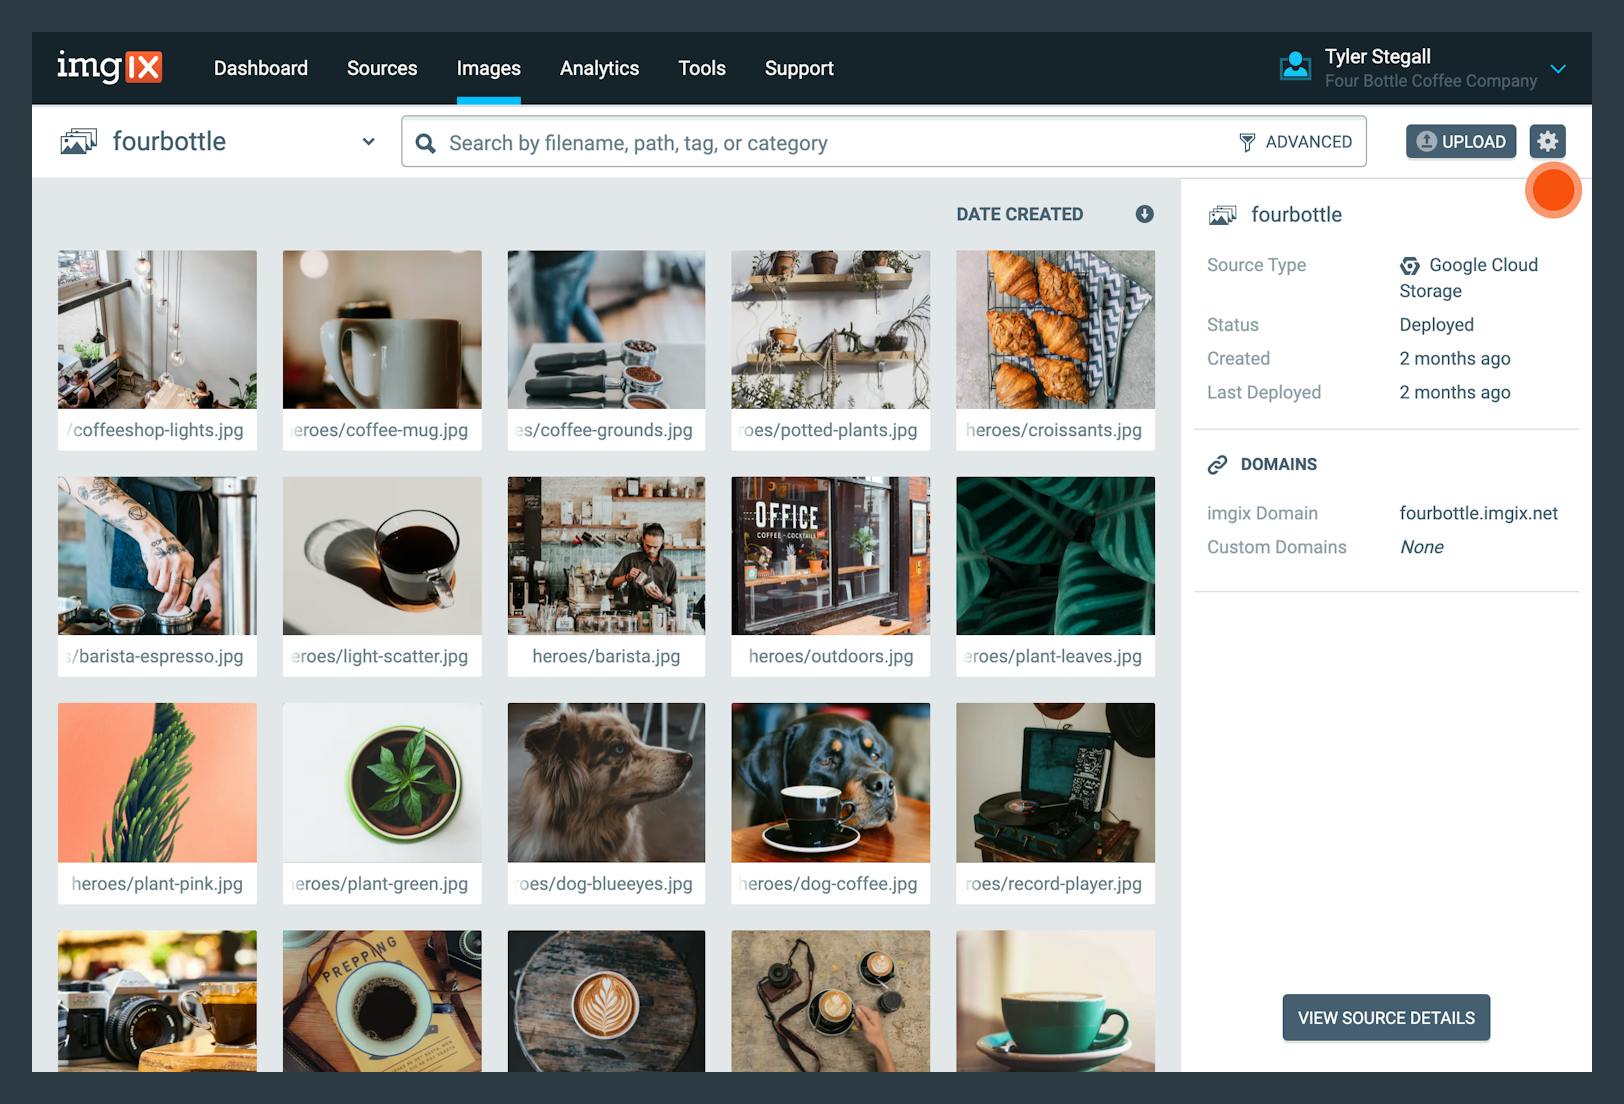
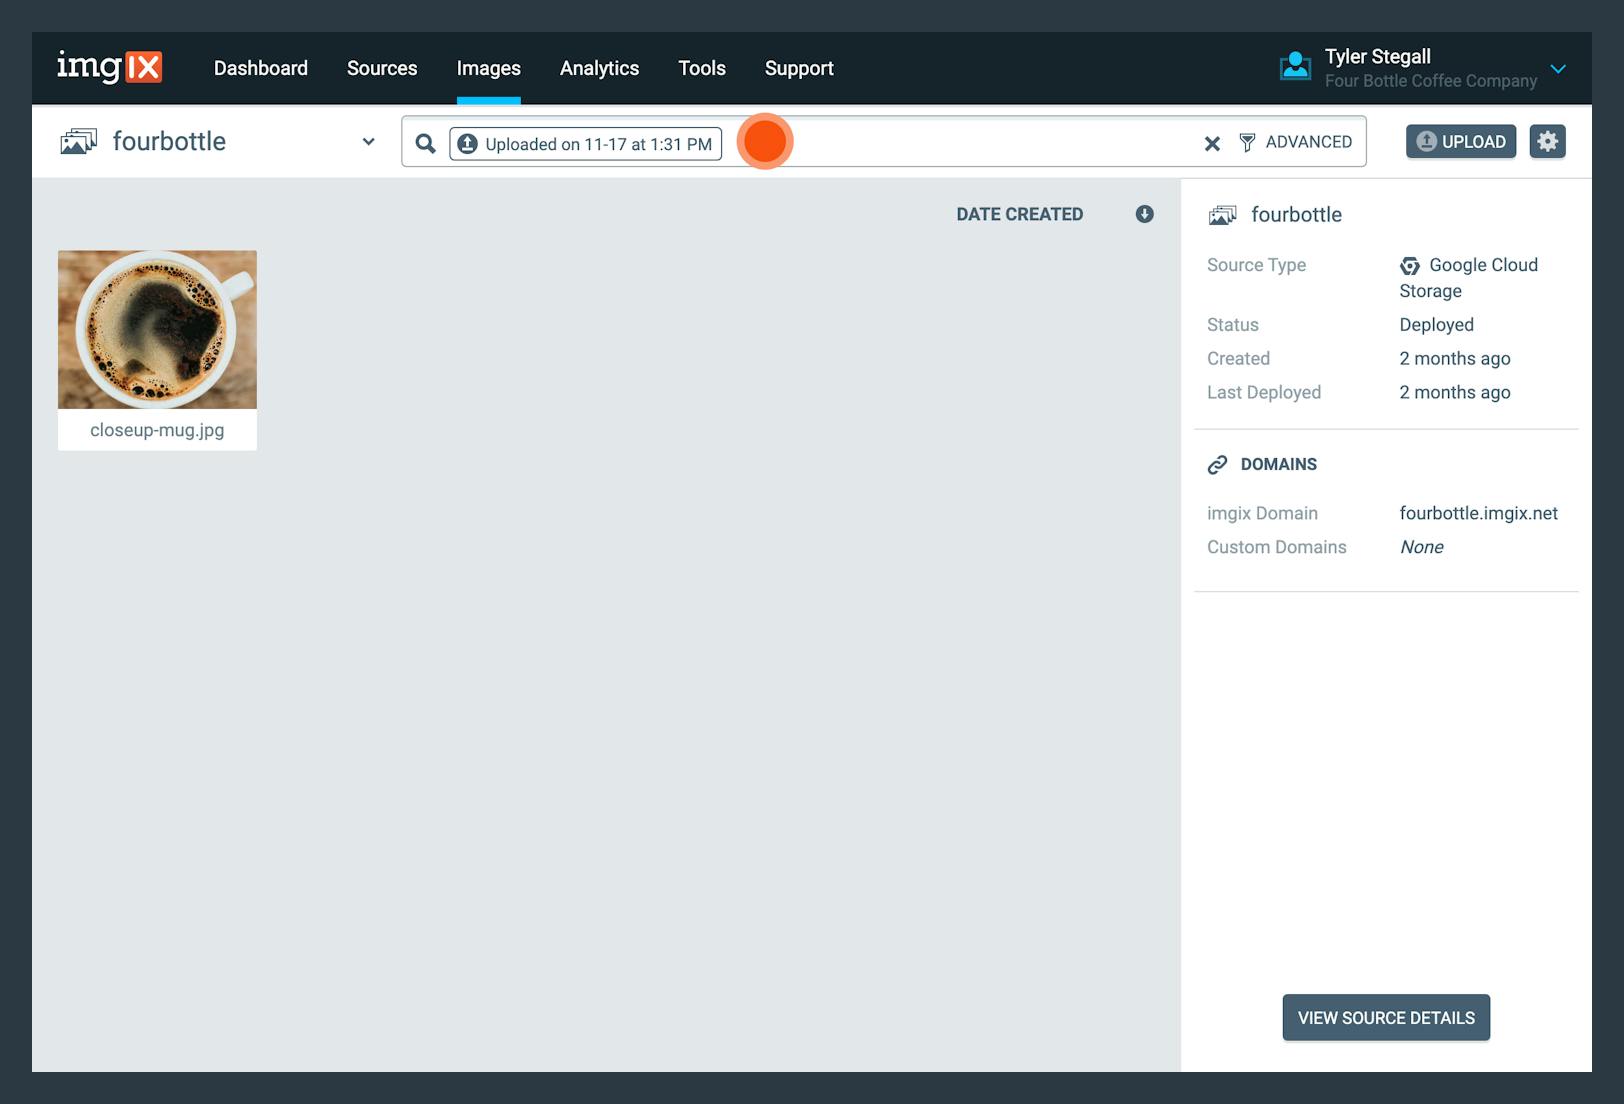
The Image Director homepage will bear witness the List View, which you tin use to browse all of your images in a particular Source. You tin can switch between Sources past selecting from the Source dropdown in the upper left corner (you will not run across a dropdown pick if your Image Managing director setup has only ane Source with images).

Past default, images are sorted past Appointment Created, with the most recent images beginning. The other supported sorts are Engagement Updated and File Size. All sorts tin can exist either ascending or descending.
Paradigm Details
Clicking on an image thumbnail in the List View will load that image'south details in the Info Console on the right.
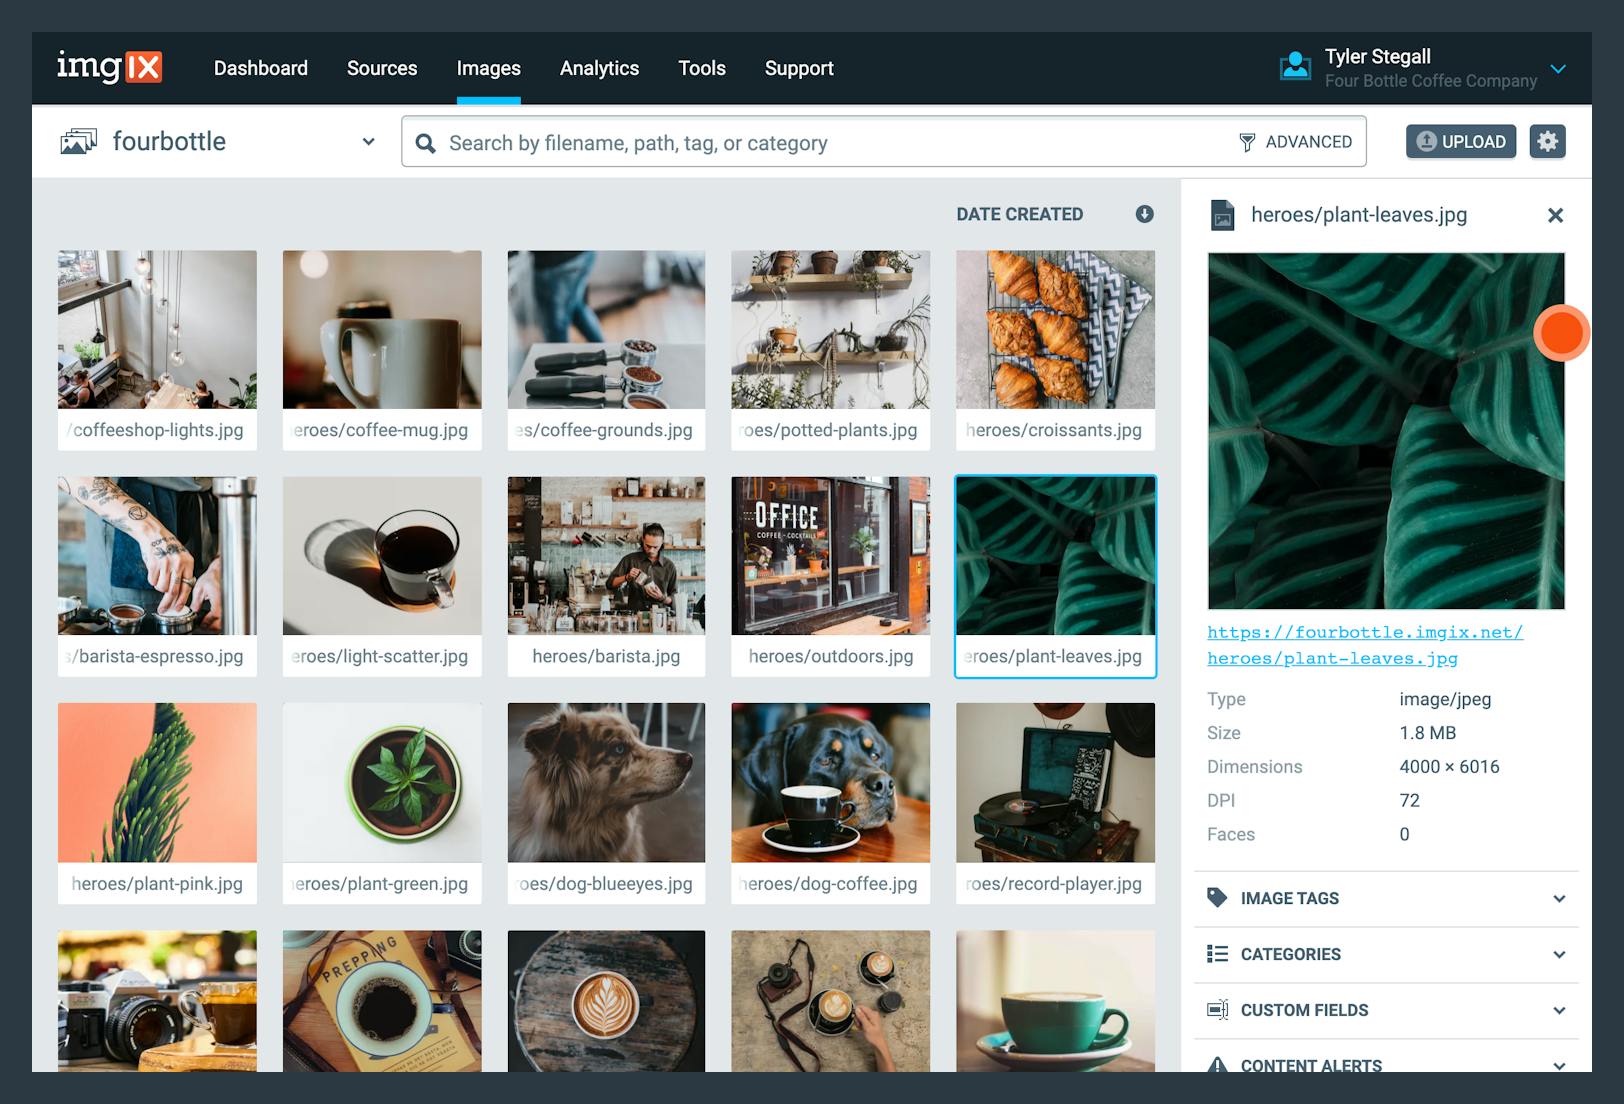
The Info Panel displays metadata, motorcar learning–generated tags, user-defined categories, user-divers custom fields, content alerts, and color information. Each section can be toggled open or closed and Image Manager volition remember the airtight/open up state per device/browser.
Metadata
This section displays paradigm metadata, including:
- Filename
- Clickable imgix URL (due east.m. https://assets.imgix.net/examples/bridge.jpg)
- Content Type
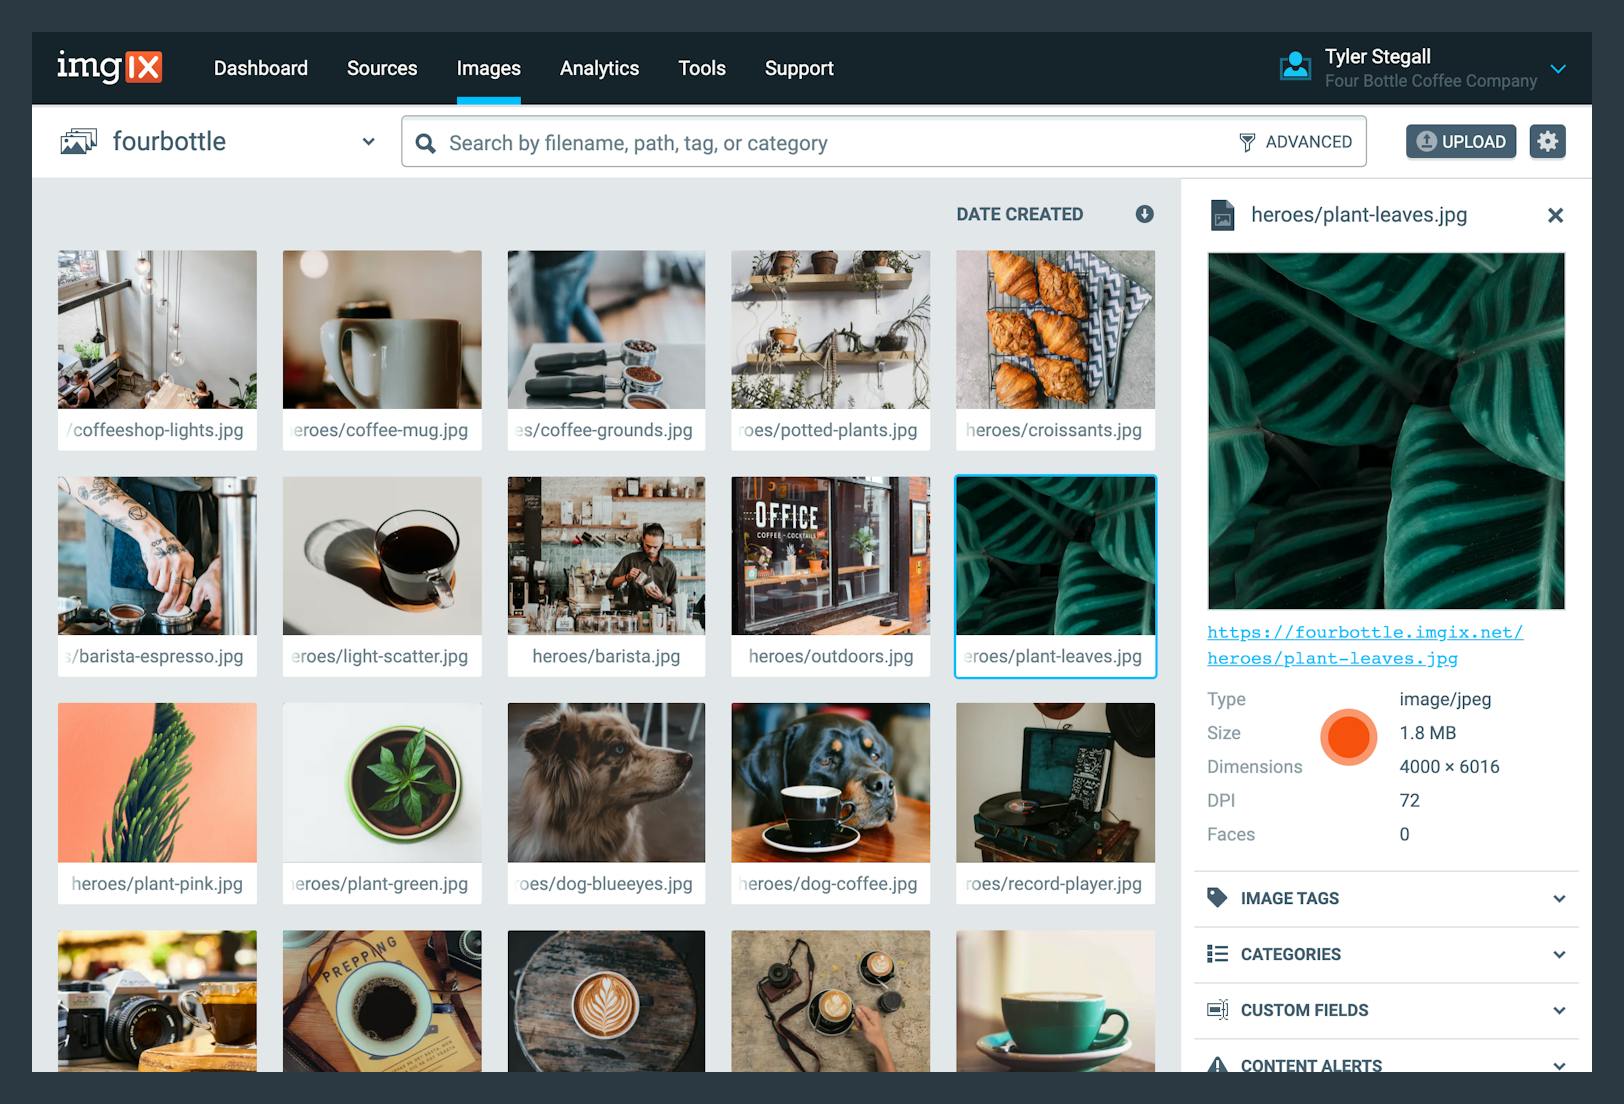
- File Size
- Dimensions
- DPI
- Faces (if face detection is enabled for your business relationship)
Prototype Tags Image tags are generated by motorcar learning–powered analysis. Tags are used to draw the content or subject field matter of the image. Tags are displayed in order of their confidence score, which yous tin can meet if you hover over a specific tag.
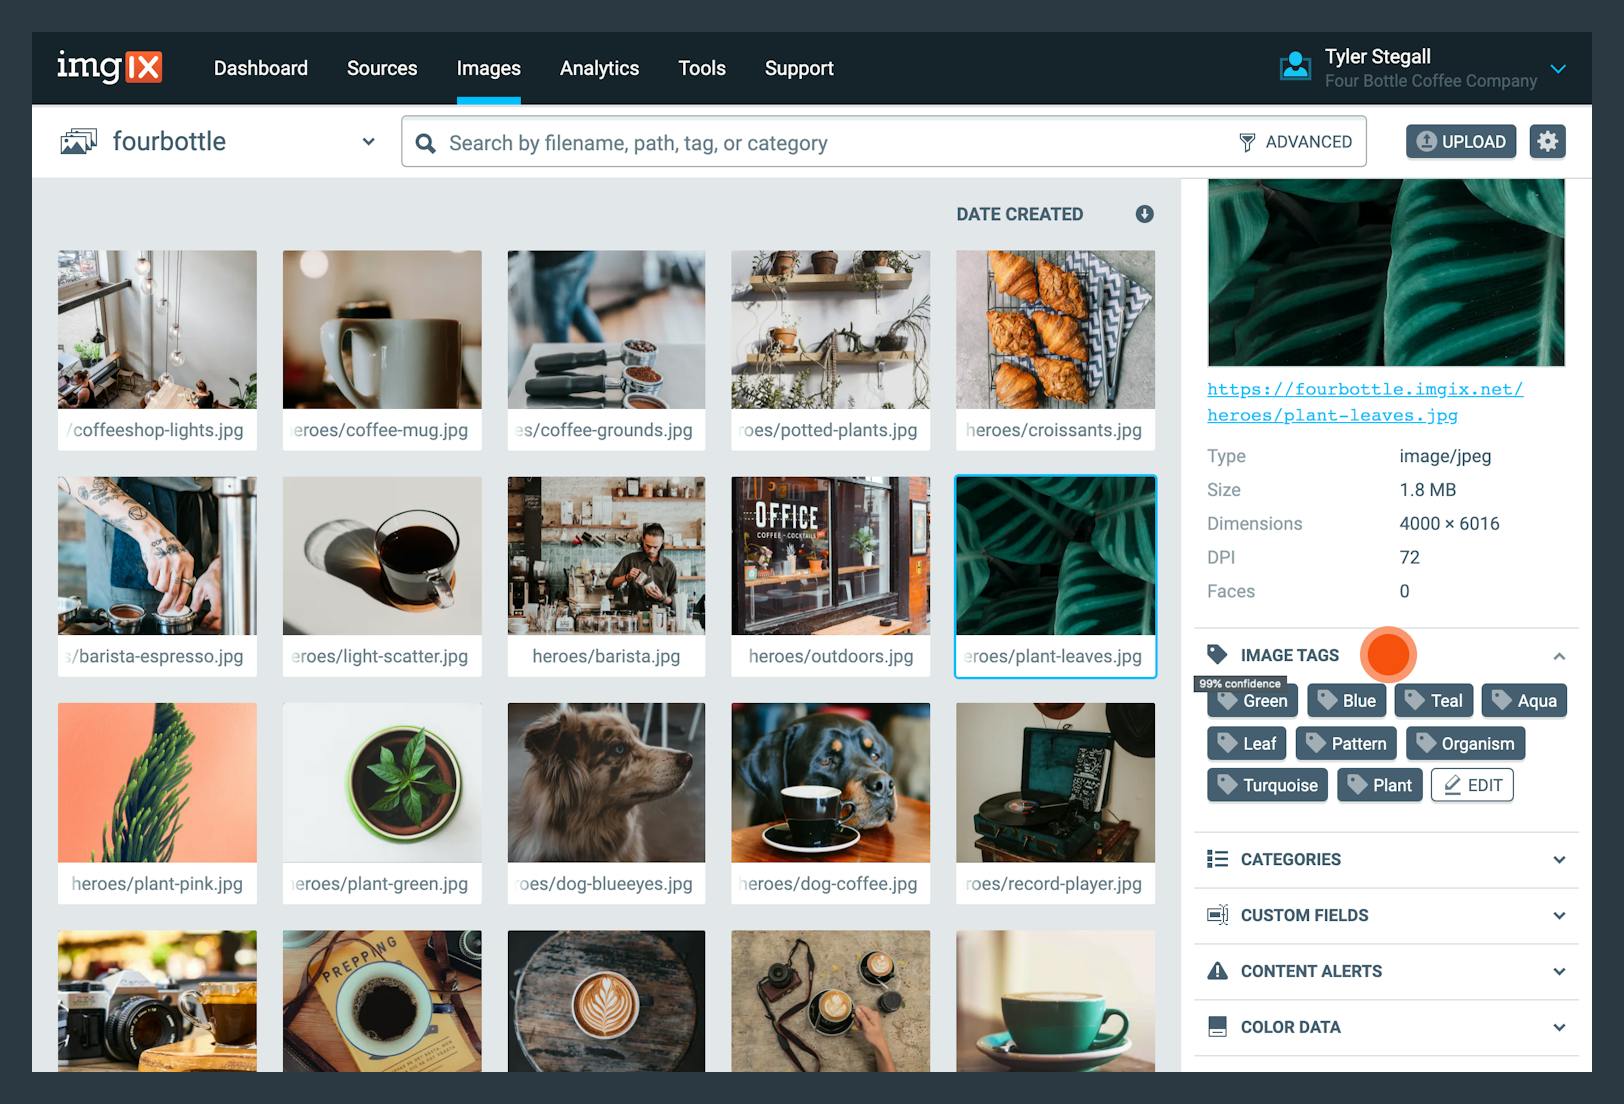
Clicking on a tag will execute a search for other images in that Source with the same tag.
If you lot would like to remove a tag from an epitome, click the "Edit" push button, click the "×" next to any tag that should be removed, then click the "Save" button. Removed tags will still appear but will be greyed out and the confidence level will be set up to 0%.
Epitome tag generation is an Enterprise feature and is not available for all accounts. Contact us if you would similar to enable this premium feature for your business relationship.
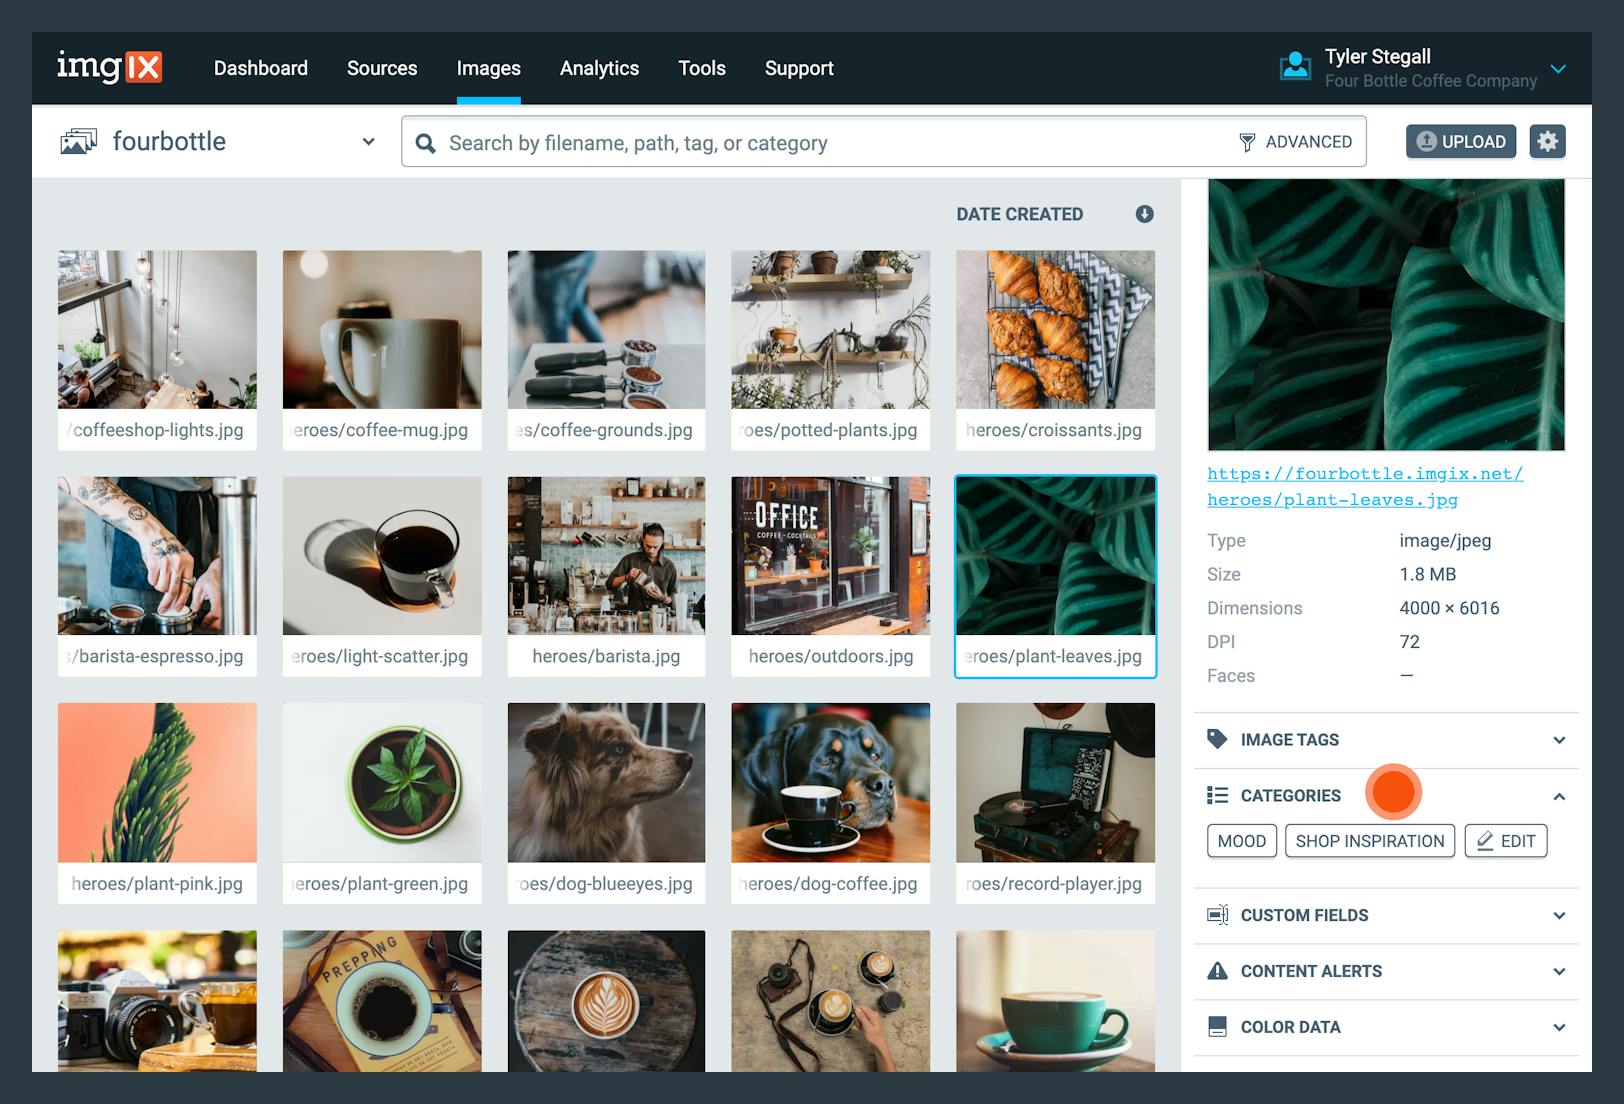
Categories
Categories are divers by users and can be used to organize your images. To add a category, click the "Add" button and and then either choose an existing category or click "Add new category" and type a new category. Clicking on a category volition execute a search for other images in that Source with the same category.
Categories tin exist removed or edited via Image Manager Settings.
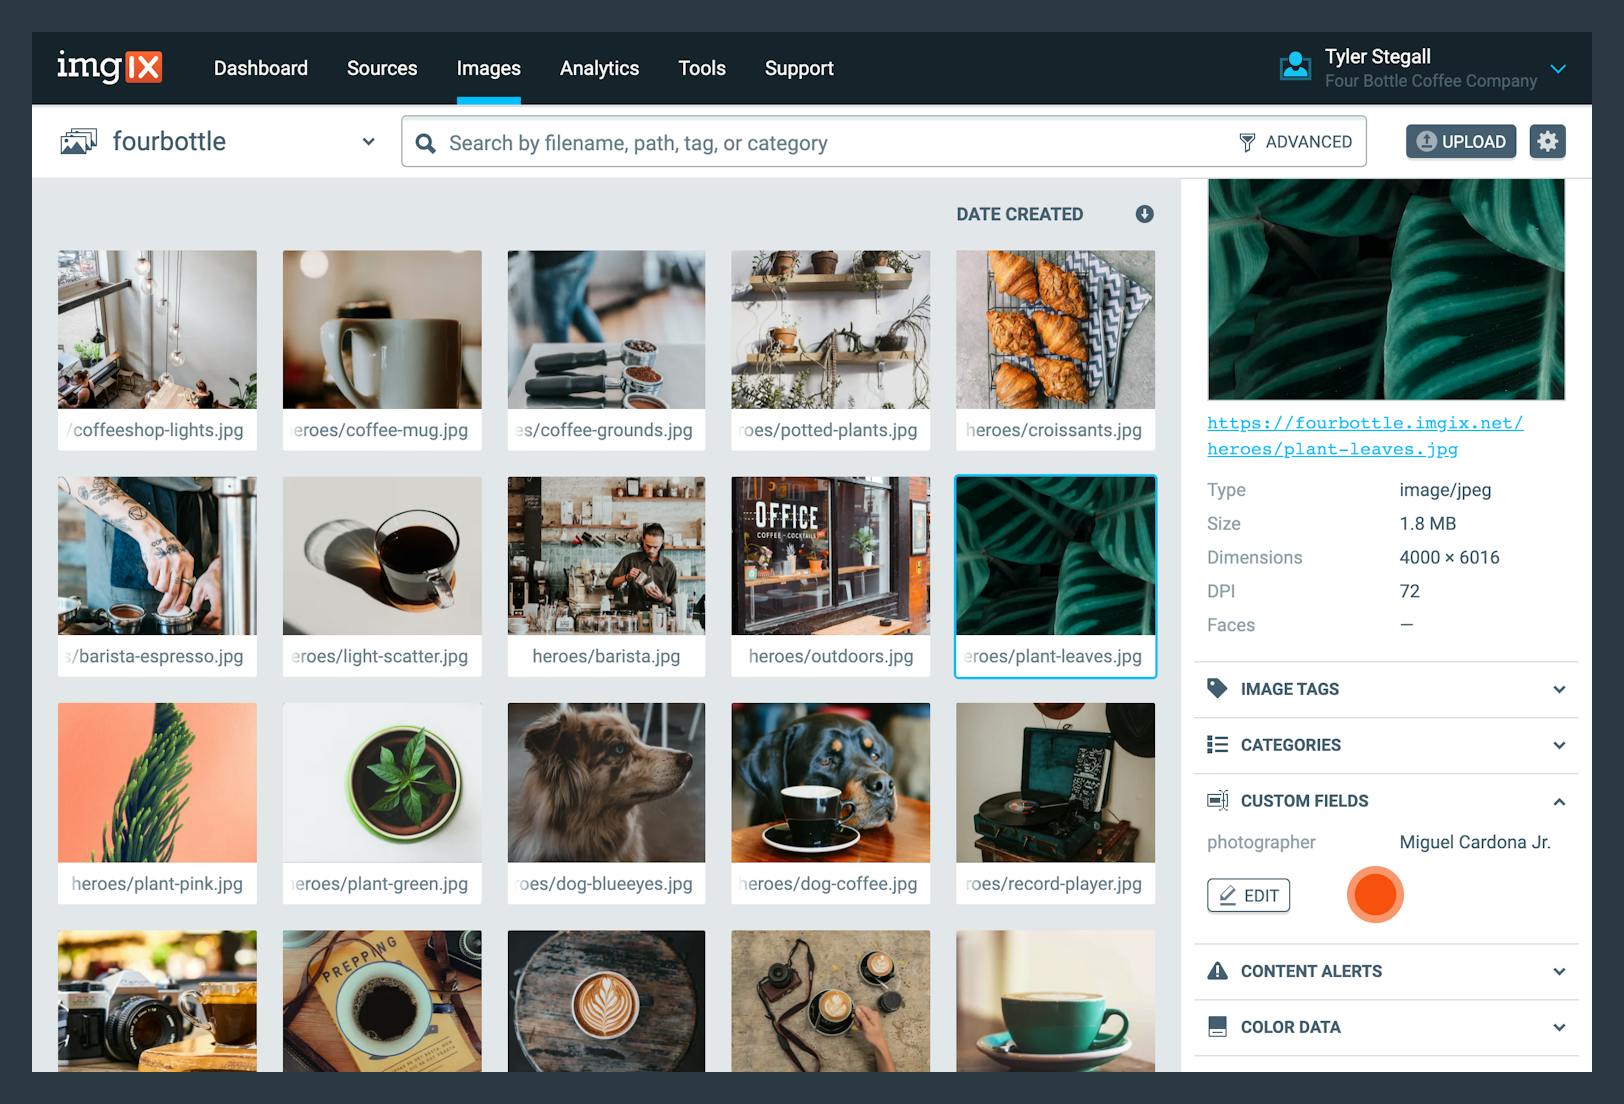
Custom Fields
Custom fields are key-value pairs defined by users that can exist used to associate information with your images. A mutual apply example is to add together a user or production ID, where the key might be "User ID" and the value would exist "123". To add a custom field, click "Add", then either select from available keys or select "Add together New Key". Enter your fundamental and value, then click "Save".
Custom field keys can be removed or edited via Prototype Director Settings.
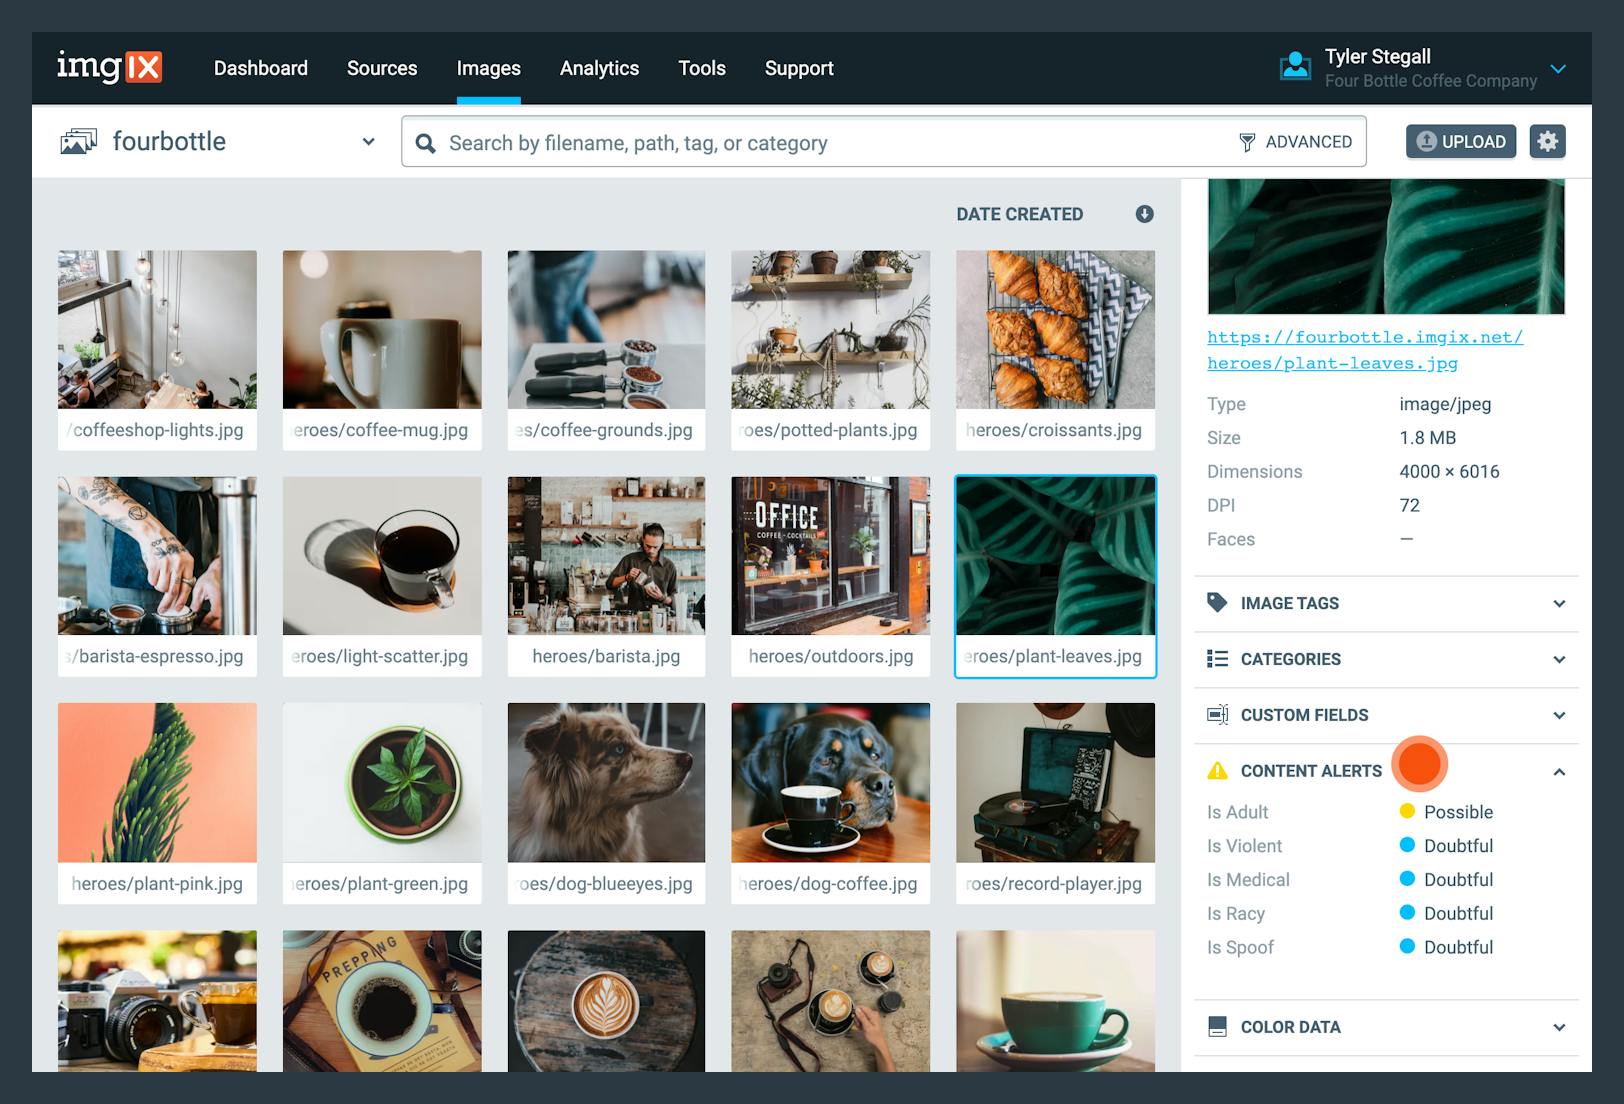
Content Alerts
Content alerts are generated by machine learning–powered image analysis and cover five categories: Adult, Violent, Medical, Racy, and Spoof. Each image will receive a score in each of the 5 categories, listed here from low to loftier probability: Hundred-to-one, Unlikely, Possible, Likely, Probable. If the image scores Probable or higher in either the Adult or Violent categories, the icon in the content alerts header volition change to reverberate the severity of the content alert. (The image highlighted in the screenshot below is not actually classified as Possible Adult; it is merely used equally an illustration.)
Content alerts are an Enterprise characteristic and are non available for all accounts. Contact u.s. if you would like to enable this premium feature for your account.
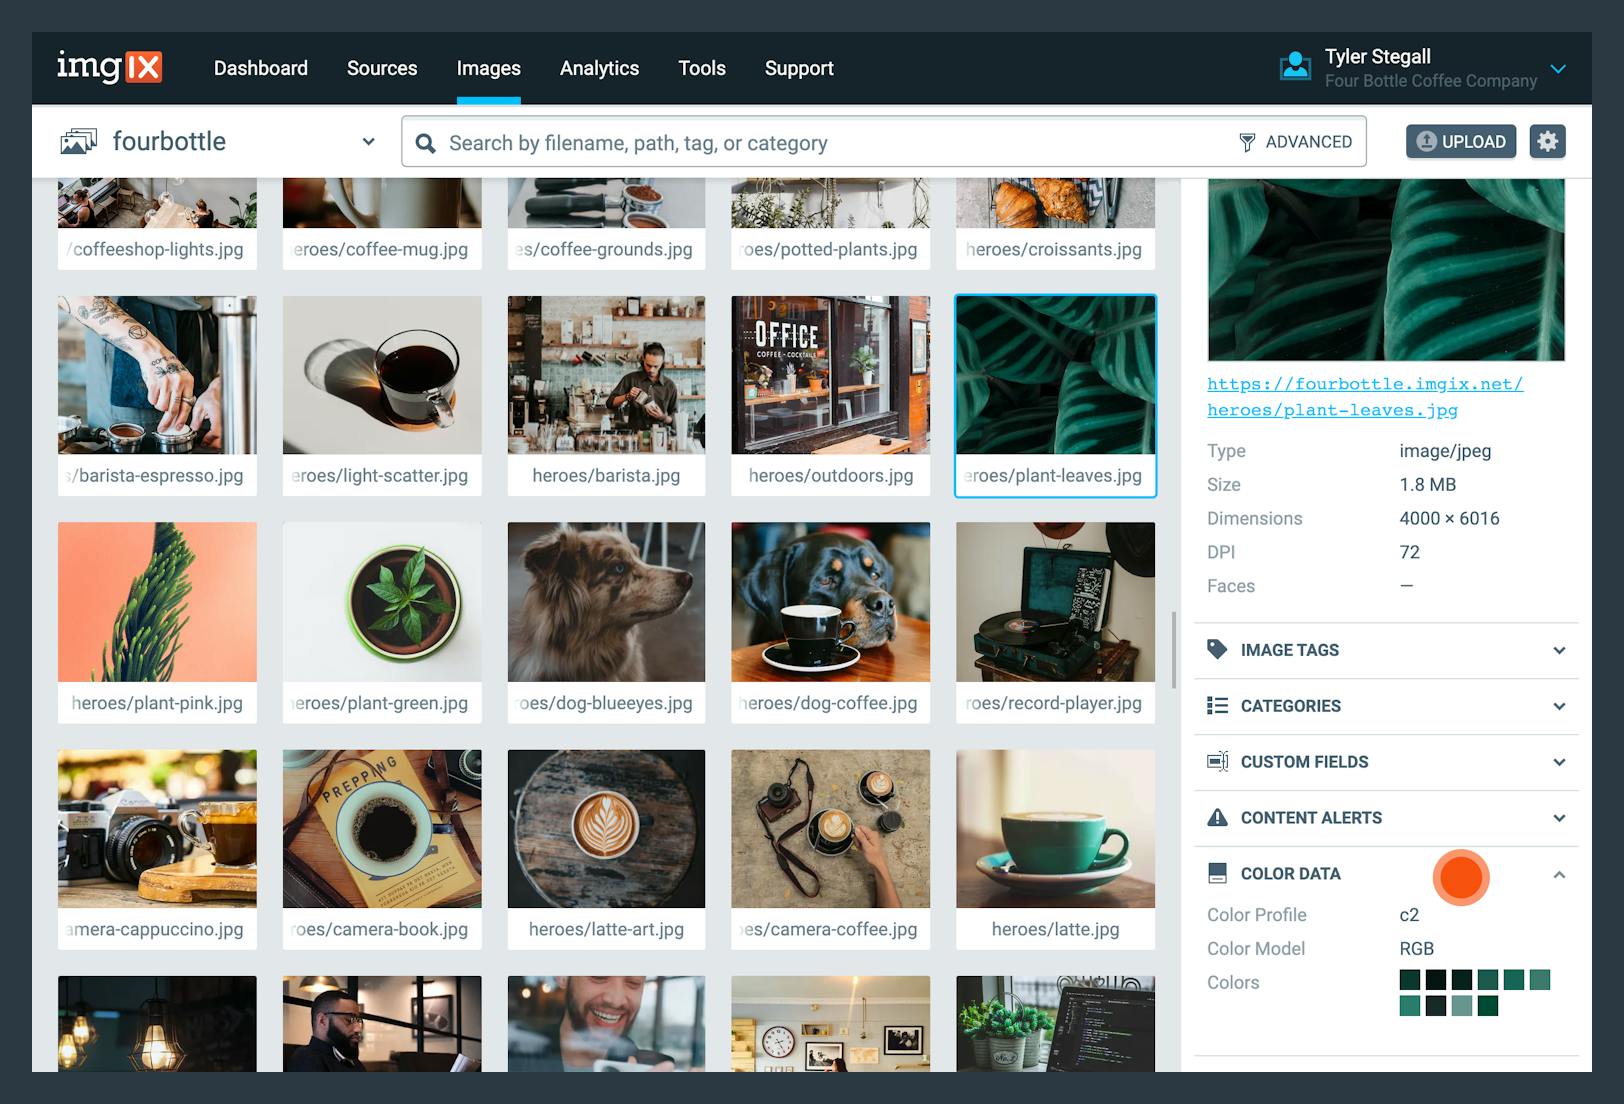
Color Data
The colour data section will show the color contour, color model, and the image's dominant colors. Clicking on a colour will execute a search for other images that contain that colour.
Color extraction is an Enterprise characteristic and is not available for all accounts. Contact united states of america if you would like to enable this premium feature for your account.
Image Detail View
The image detail view shows the image at a larger size and at its original attribute ratio. Open the paradigm detail view either past clicking on an already-selected image thumbnail in the list view or past double-clicking on an image thumbnail in the list view. Exit the epitome detail view by clicking the "x" in the upper left corner or by pressing Esc on your keyboard.
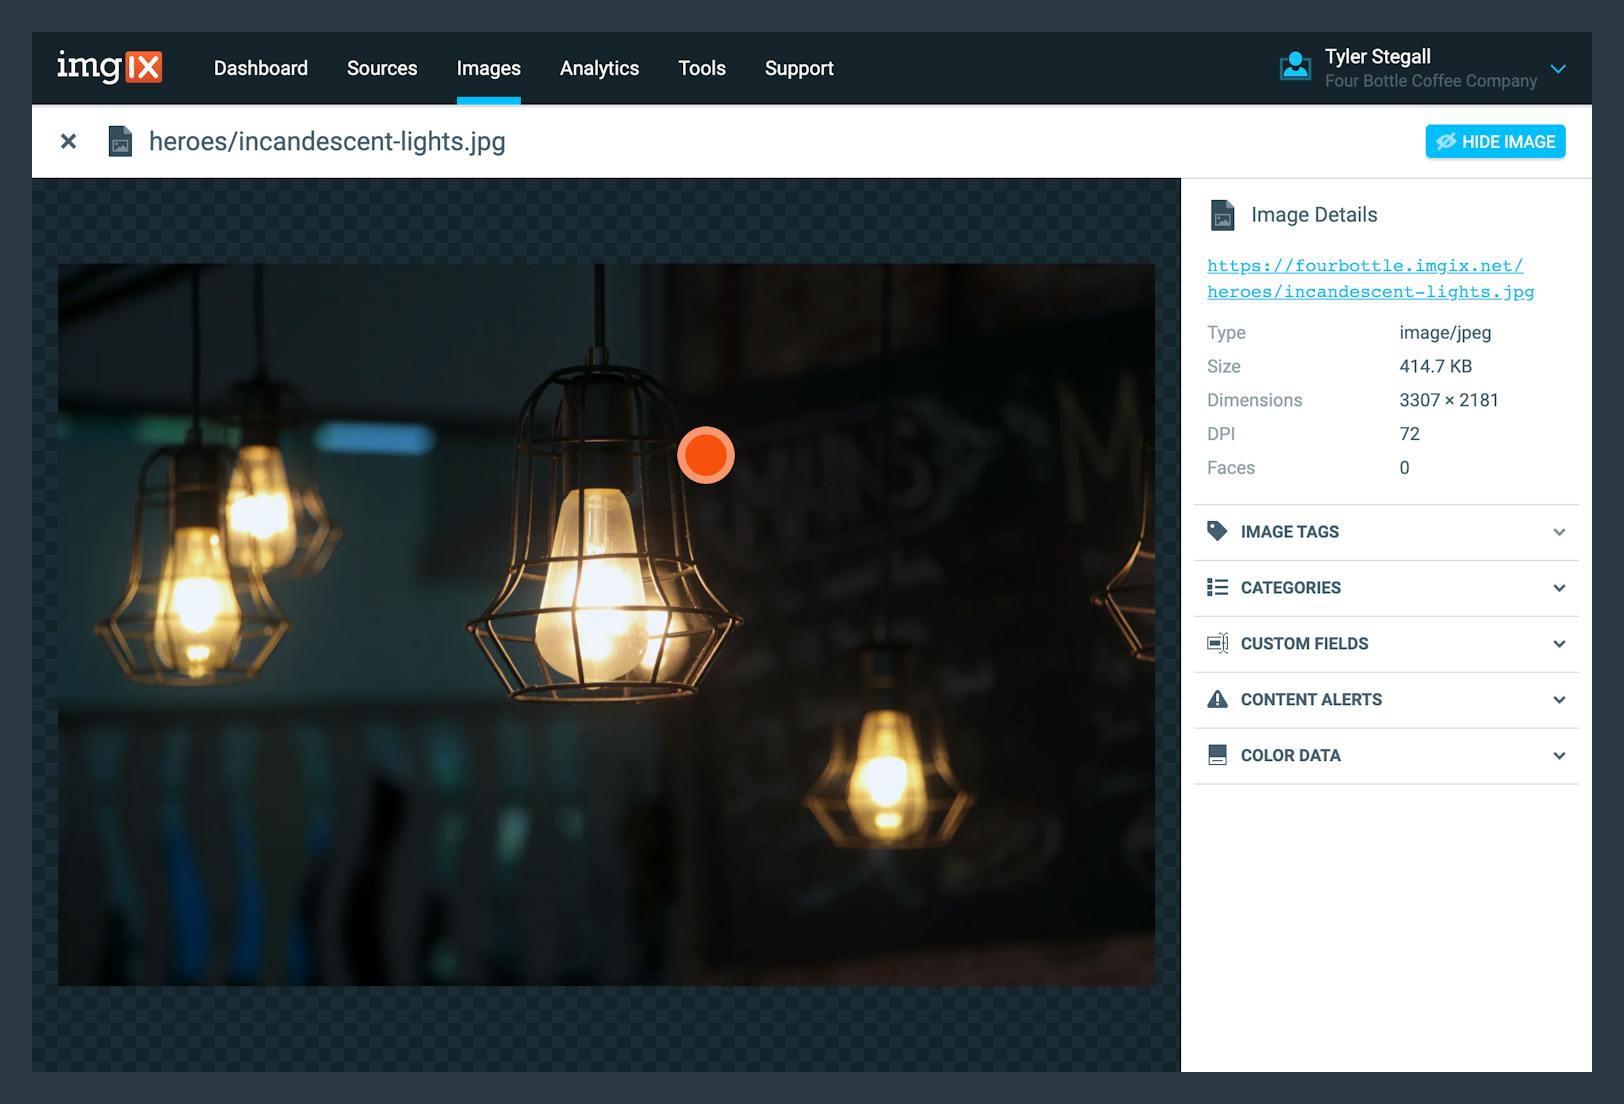
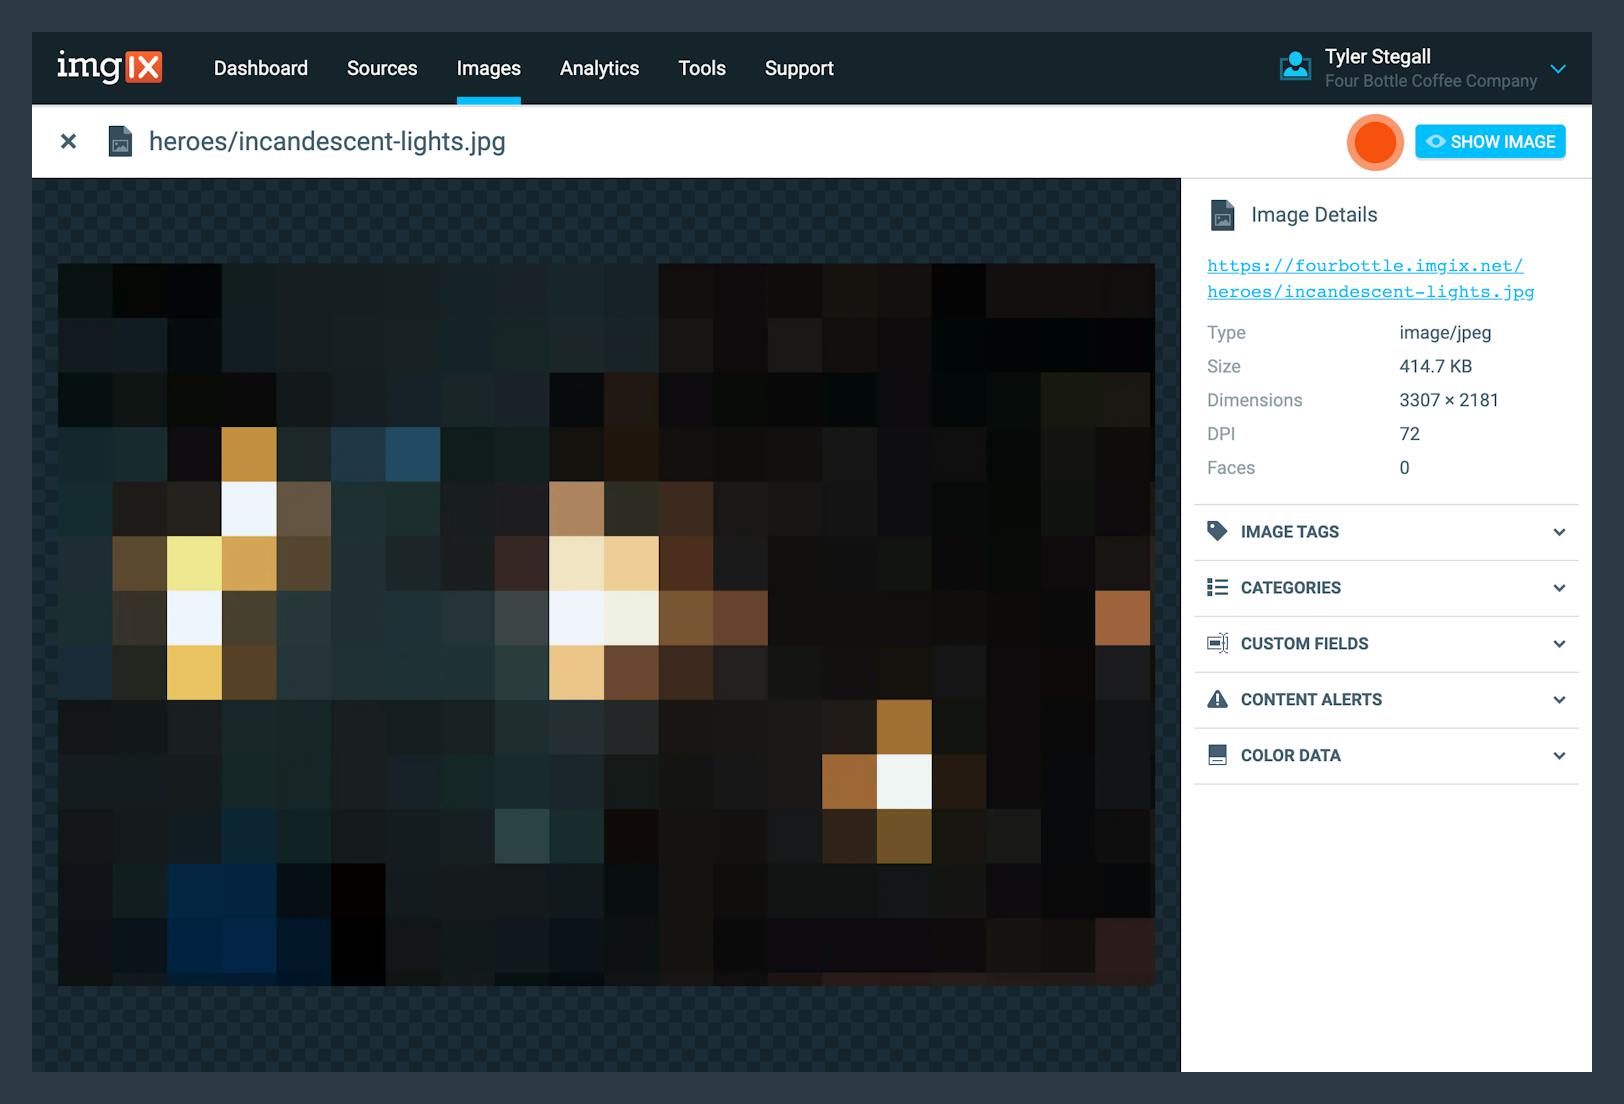
The image detail view also has an option in the upper right corner to show or hide the epitome. Hiding an prototype will pixelate the prototype so that the original content is no longer discernible, and showing an prototype volition restore the original image. Showing or hiding an image merely has an effect within Paradigm Director; information technology does not bear upon the actual rendering of the image outside of Image Manager. Once an paradigm is shown or hidden, it volition remain that way inside Paradigm Manager, though that state will non exist saved across browsers/devices or across users.
Past default, any image that scores "Likely" or college in the Adult or Vehement category will be shown as hidden.
Searching
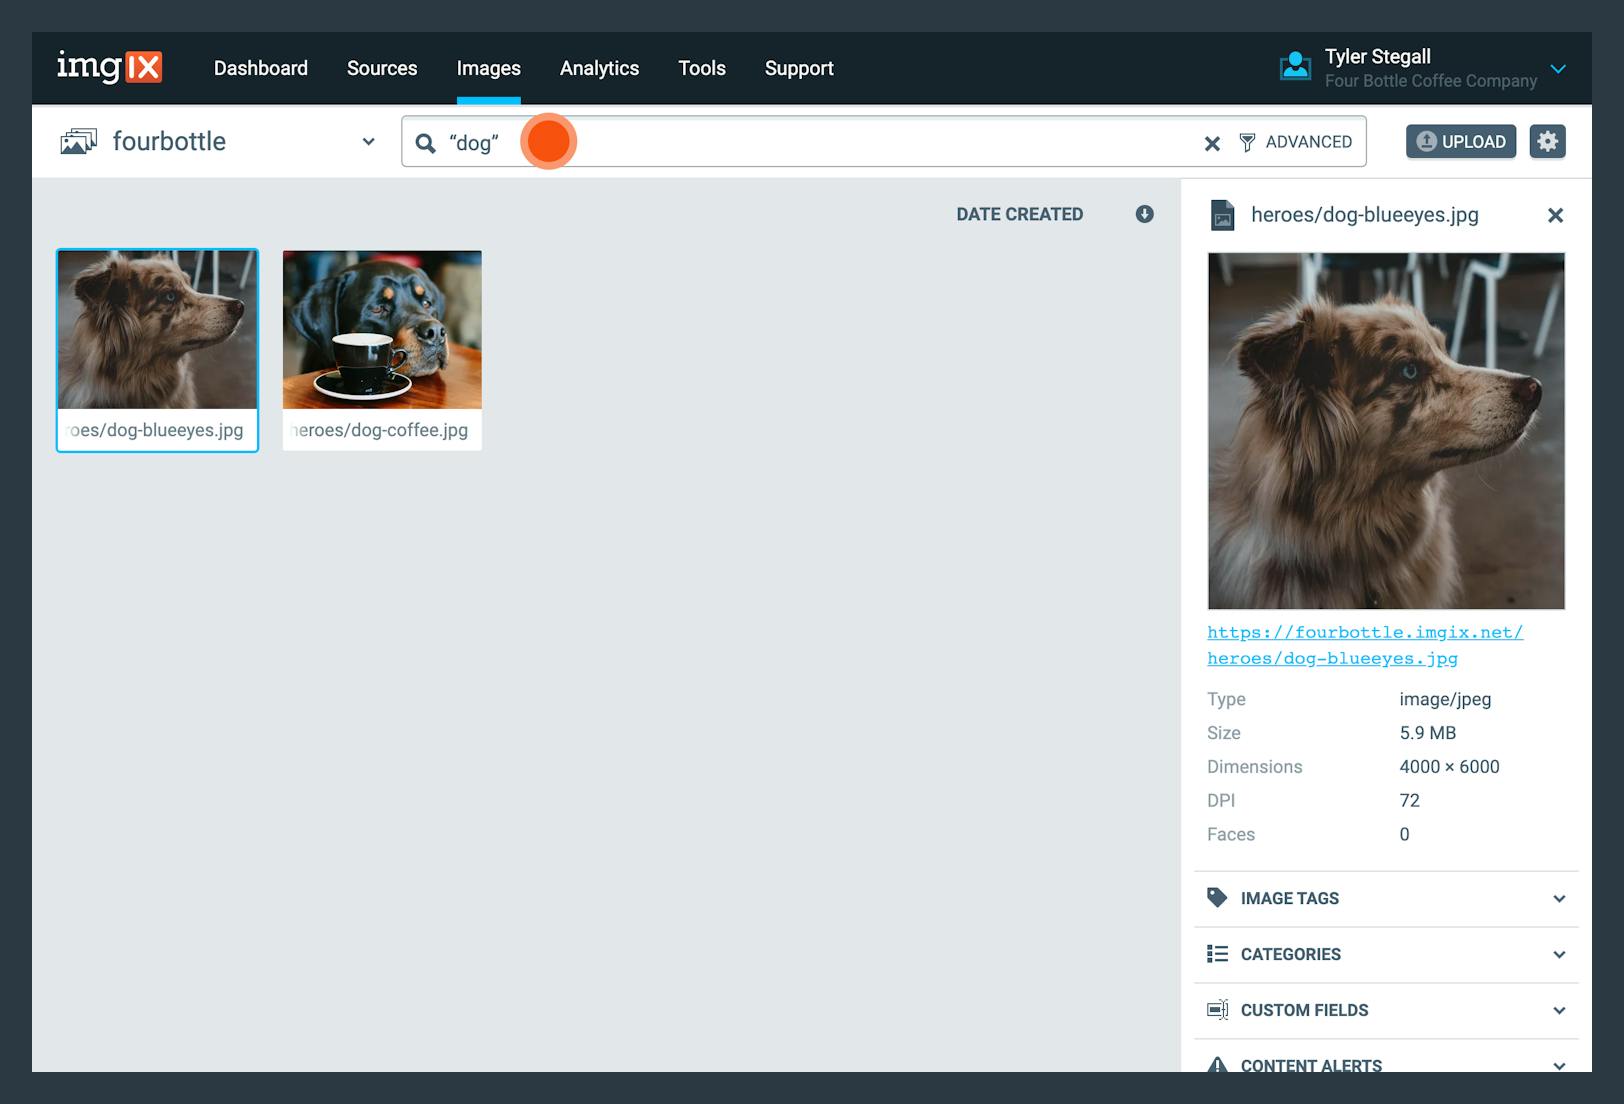
Keyword Search
Typing in the search box near the peak of the screen volition execute a keyword search. This will search across multiple pre-adamant fields, such as the epitome origin path, the proper noun, description, tag, category, custom field, etc. Exact behavior is subject area to change.
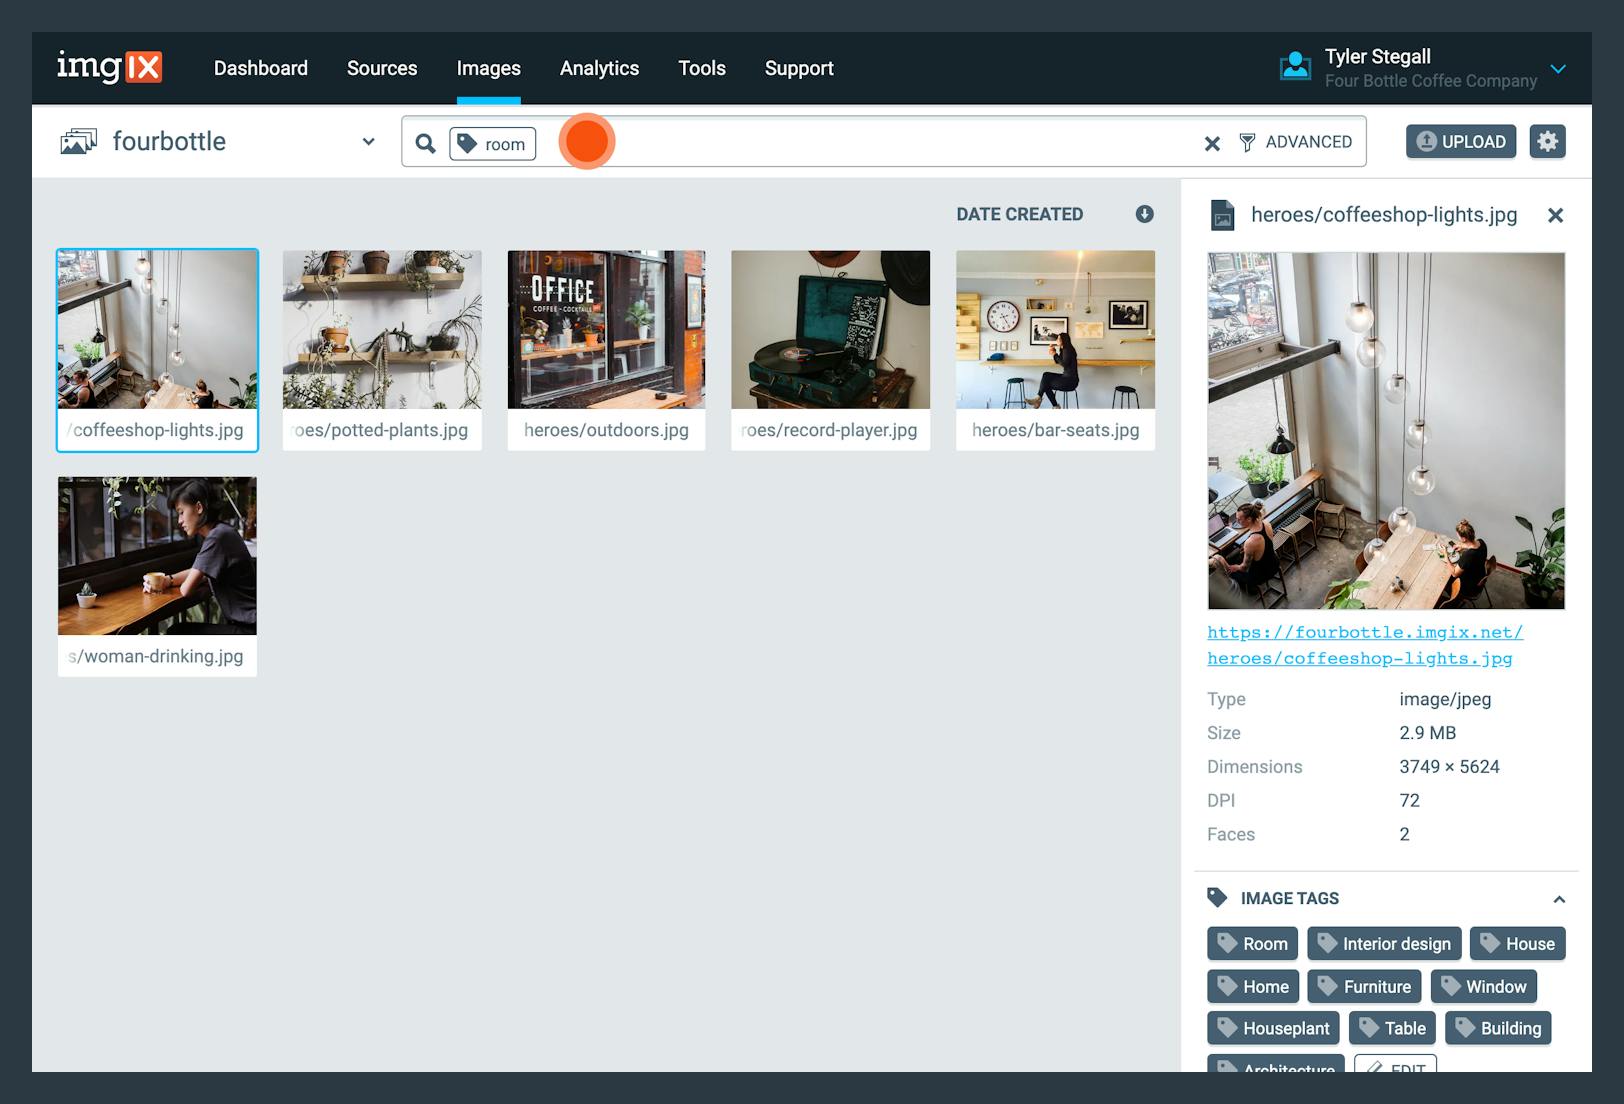
Tag Search
Searching can be performed by tag. Navigate to an image and click on i of its tags to execute a search for other images with the same tag.
Category Search
Searching can be performed by category. Navigate to an prototype and click on one of its categories to execute a search for other images with the same category.
Color Search
Searching can exist performed by color. Navigate to an epitome and click on one of its color swatches to execute a search for other images with a similar color.
Advanced Search
To perform more than complex searches, click on "Advanced" in the right side of the search bar. Use Advanced Filters to search based on tags, categories, custom fields, colors, folder path, content alerts, faces, animations, file types, and whether the prototype has been edited by a user. Selecting multiple filters will execute a search for images that see the criteria of all of the filters.
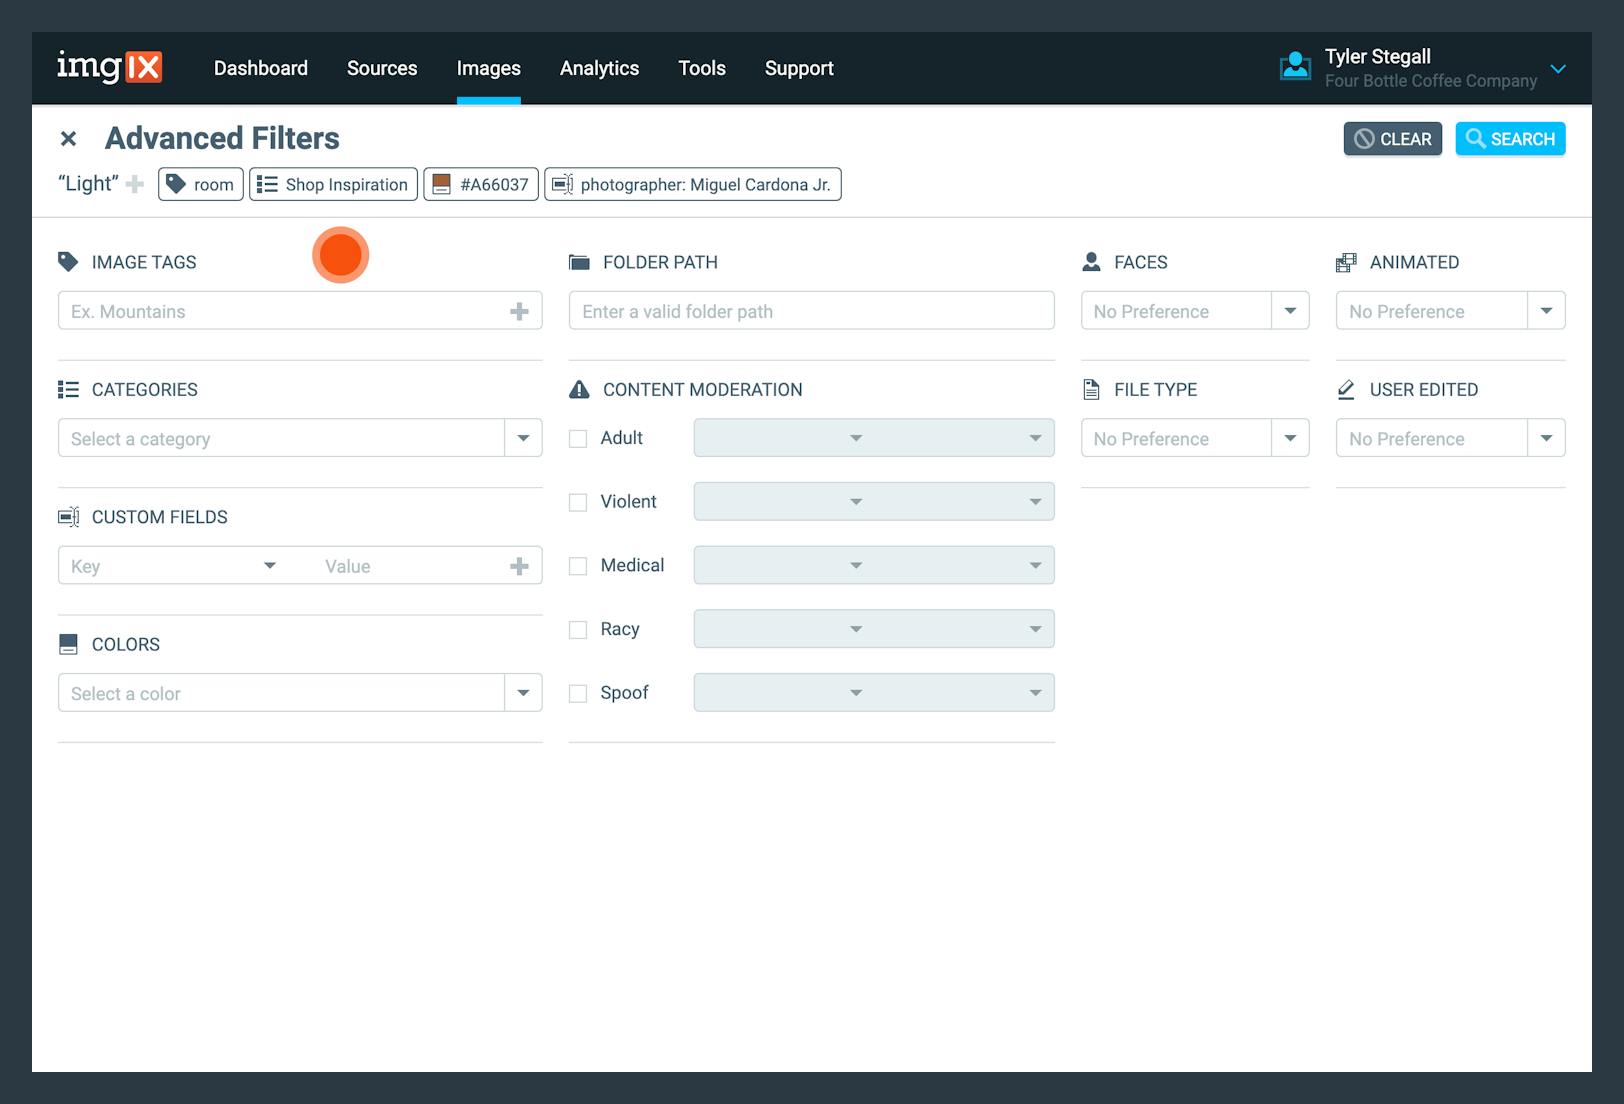
Image Director Settings
The Image Director Settings page allows users to edit their created categories and custom fields keys. Admission this page past clicking on the link in the Account Settings page or by clicking on the gear icon in the upper right corner of the Image Manager.
Editing a category or a custom field fundamental will automatically update that category or custom field key for every image that is associated with that metadata. Deleting a category or custom field cardinal volition remove that metadata from every paradigm with which it is currently associated. Note: Deleting a category or a custom field primal is non reversible, so proceed with caution.
Uploading
Image Manager allows you to upload straight to your cloud storage–backed Source (Azure, GCS, or S3). Uploading to Web Binder or Web Proxy Sources is not supported.
Before you begin uploading assets to a Source, you must consummate the Upload Setup for each Source yous wish to upload to.
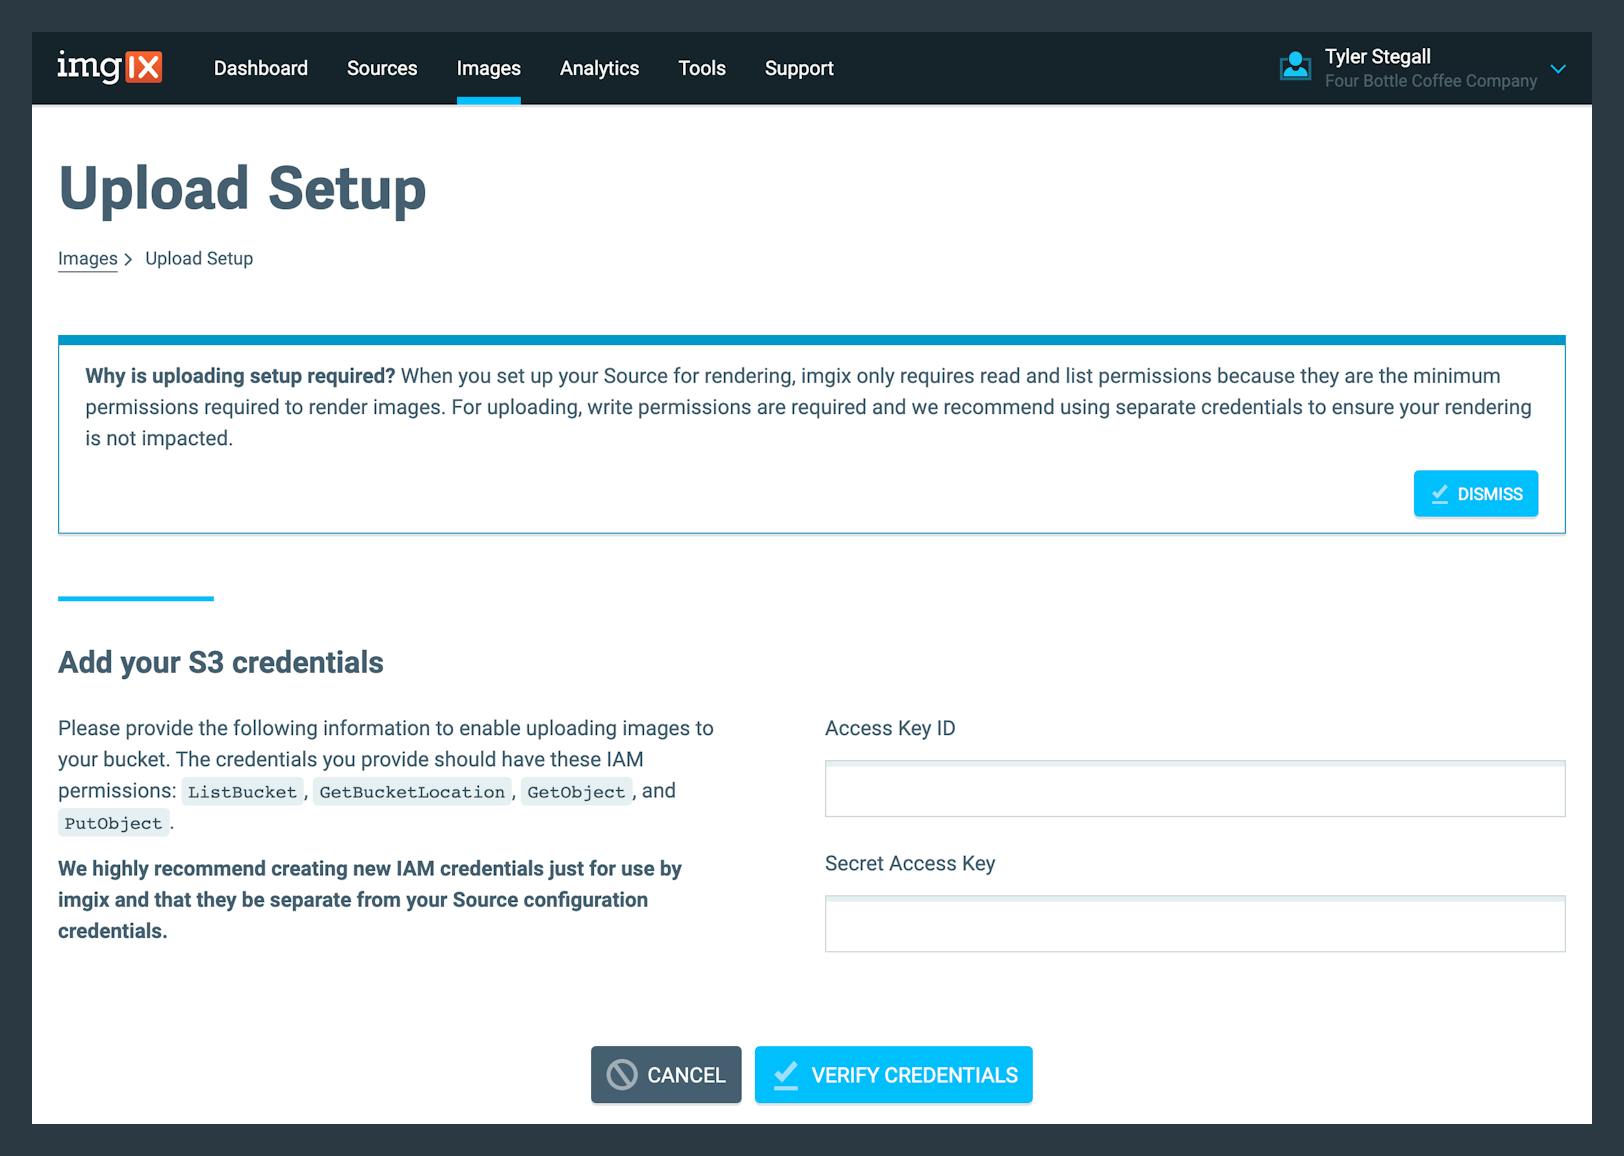
Why Is Uploading Setup Required?
When you set up your Source for rendering, imgix only requires read and list permissions—the minimum permissions required to render images. Write permissions are required for uploading, and we recommend using separate credentials to ensure your rendering is not impacted.
Upload Setup
If your Source has not yet been configured for uploading, click the "Upload" push in the upper right corner of Image Managing director to begin the setup procedure. Alternatively, dragging and dropping files into the List View will bring you to the Upload Setup view.
We highly recommend generating new credentials merely for utilise past imgix and that they exist separate from your rendering credentials.
Azure
For an Azure Source, y'all will need to generate a new shared admission signature (SAS) token. To generate your SAS string, use the Shared Access Signature Settings page for the storage account. Change the post-obit settings:
- Allowed Services: Select
FileorBlob, depending on the service type. - Allowed Resources Types: Select only
ContainerandObject. - Allowed Permissions: Select
Read,List, andWrite. - Kickoff and Expiry Date/Fourth dimension: Modify the end date to "2029-01-01" or choose a date at least one twelvemonth in the hereafter.
Finally, click Generate SAS and connexion string. Below that is a text box labeled "SAS token". The token begins with "?sv=". The contents of this text box are your SAS token.
GCS
If you're using a GCS Source, you can add together the Storage Object Admin office from GCS's role list. Subsequently you add the part to the user, you must generate the interoperability key past going to the Settings folio in your console, then generating the key in the Interoperability tab.
S3
The "Amazon S3 Full Access" policy template for your IAM account is the easiest way to create new S3 credentials for uploading.
- Go to your AWS IAM Dashboard.
- Click Users on the left navigation.
- Click Add together User or select an existing user.
- If adding a User, requite them a User Proper name and enable Programme mat ic admission. Select Next: Permissions .
- Click the Permissions tab and and so the Add Permissions button.
- Select the Adhere existing policies directly tab.
- You will be presented with a list of policy templates. Scroll down or search until y'all encounter "Amazon S3 Full Access" so click the Select button next to it.
- Click Side by side: Review and so Add Permissions .
Or, if you adopt to prepare specific permissions, grant the post-obit:
-
ListBucket -
GetBucketLocation -
GetObject -
PutObject
Uploading Images
One time your upload setup is complete, you can begin uploading by clicking the "Upload" button in the upper right corner of Image Manager or by dragging and dropping files into the List View.
Hither you can specify an optional destination path for all of the images in the current upload. This is useful if you would like to upload your images into a specific subdirectory.
Note: Image Director will not overwrite anything already in your saucepan. If you already take a file named bridge.jpg in your bucket and you try to upload another file named bridge.jpg to the same place in the bucket, the upload will fail.
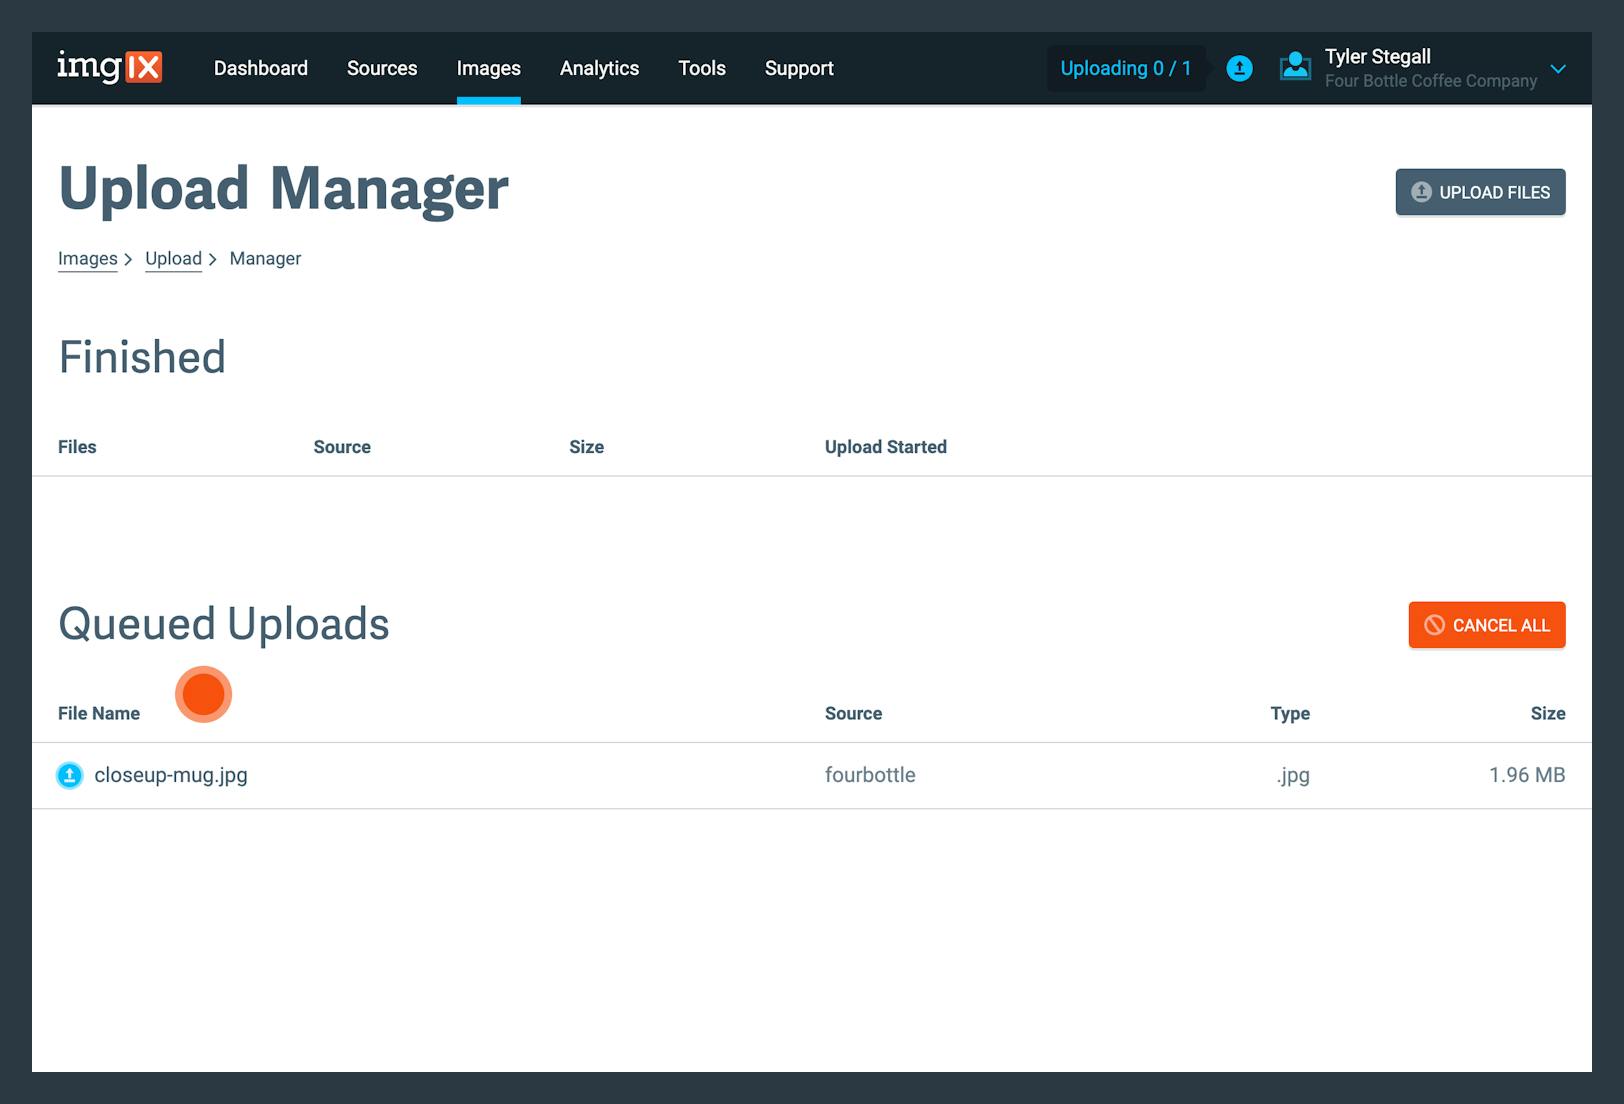
After clicking "Upload" you will be taken to the Upload Manager view, which shows the progress of your uploads. Upon completion, click the "View" push button to exist taken back to Image Manager to view your newly uploaded files.
Newly uploaded images are immediately available in Image Manager and can be searched for and modified only like any other image.
The Image Managing director supports uploading for the following content-types:
-
image/bmp -
image/gif -
image/heic -
image/jp2 -
image/jpeg -
paradigm/jpx -
image/pjpeg -
image/png -
image/tiff -
image/vnd.microsoft.icon -
image/vnd.mozilla.apng -
image/vnd.ms-photo -
image/webp -
video/mp4 -
video/quicktime -
video/webm -
video/10-m4v -
video/10-msvideo -
video/x-ms-wmv -
video/x-ms-asf
Note: While uploading for the Image Manager is restricted to the listed content-types to a higher place, the Management API supports uploading for any content-type.
Video Status
When video is enabled on a Source, compatible input formats will be automatically detected and transcoded. Video transcoding will terminate with ane of the following statuses:
- Processing: The video is currently being processed past our service.
- Processed: The video has been successfully converted and tin now be served through the
imgix.videodomain. It will remain until it is detected to have been deleted from the saucepan. - Errored: There was an issue while processing the video. Bug might exist due to one of the post-obit:
- Incorrect input format: the video was detected in the bucket but is incompatible with the current supported formats.
- File too brusk: video files must be a minimum of 0.5 seconds in length.
- File inaccessible: consequence accessing file in saucepan.
If a video was processed and is deleted, it should disappear from your Image Manager within 72 hours. If a deleted video persists for more than than 72 hours, or if you have a video that is unexpectedly missing in the Prototype Director, please contact support with your video URL.
Image Managing director APIs
Nearly all of the functionality provided past Image Manager in the Dashboard can also exist accomplished via API. Read the documentation for the Image Manager API to find out more.
Source: https://docs.imgix.com/setup/image-manager
Post a Comment for "Imagex Image and Fotos Upload & Management for Your Website"